
Feed costs keep rising, yet many small farmers still need a reliable protein source for chickens, fish, and birds. That is why mealworm farming in Kenya is getting more attention, especially among people who want a small, manageable farm business.
The good news is that you do not need acres of land or heavy equipment to start. By providing a sustainable alternative and a high-quality protein source for poultry, you can significantly reduce your daily expenses for chicken feed. If you set up the right space, manage the life cycle well, and find steady buyers, a mealworm unit can grow into a practical side income.
If you want to see the basic breeding flow before you begin, this beginner video is useful:
Key Takeaways
- Low Barrier to Entry: Mealworm farming requires minimal land, no expensive equipment, and can be started indoors using simple plastic containers, making it ideal for small-scale Kenyan farmers.
- Sustainable Protein Source: Mealworms offer a high-quality, cost-effective alternative to expensive commercial feeds for poultry, fish, and ornamental birds, helping farmers reduce production expenses.
- Simplified Operations: The business thrives on a basic life cycle that can be managed in three distinct tubs (breeding, growing, and pupae), requiring only wheat bran, moisture sources like vegetables, and routine cleanliness.
- Market Potential: Beyond direct feed sales, farmers can monetize the enterprise by selling starter colonies and high-quality worm casting fertilizer, providing multiple revenue streams within a growing niche.
Why mealworms can be a smart farm business in Kenya
As of 2026, the farming of Tenebrio molitor is still a small, early-stage niche in Kenya. That gives new farmers room to build local supply before the market gets crowded, establishing a solid agribusiness venture. Demand already exists because poultry keepers, fish farmers, bird owners, and small organic farms all need protein-rich feed.
Mealworms also fit places where land is tight. You can raise them in trays inside a spare room, store, or shaded shed. They use less space and less water than most livestock. In addition, recent Kenya-focused research has shown strong survival rates when mealworms are raised on wheat bran mixed with plant waste, which matters when you want lower-cost feed options.
In Kenya, mealworm farming currently operates as an informal and unregulated agricultural activity. There are no specific government licensing requirements or strict legal mandates that govern the domestic production of these insects for animal feed at a small-scale level.
While the industry remains largely unregulated, farmers are still expected to follow general animal welfare and feed safety practices, especially if they intend to sell their products to commercial feed manufacturers. Keeping your farm clean and organized remains the best way to ensure your output meets the quality standards expected by potential local customers.
What makes mealworm farming different from other livestock ideas
A goat, cow, or pig needs space, daily cleaning, and much more feed. Mealworms are low maintenance by comparison, needing only trays, dry bedding, and simple checks. While this insect-rearing method is often compared to Black soldier fly farming, mealworms remain a popular entry point for beginners who already keep chickens or run a small mixed farm.
You can also start small without looking small. One farmer may begin with a few tubs, learn the cycle, then add more trays once sales improve. That step-by-step growth is one of the best parts of this business.
For poultry keepers, the protein case is strong. Research on yellow mealworm in poultry diets helps explain why farmers keep looking at mealworms as an alternative feed ingredient.
Who buys mealworms in the Kenyan market
The first buyers are often close by. Those involved in poultry farming use live or dried mealworms as a protein boost, especially for chicks, layers, and breeding birds. Feeding mealworms is known to contribute to the distinct Kienyeji taste of meat and helps farmers produce yellow-yolked eggs. Fish farmers value them because insect protein fits well into feed plans. Pet owners and bird lovers buy smaller quantities for birds, reptiles, and ornamental animals.
Organic growers can also become customers. Some want mealworms for animal feed on integrated farms, while others want insect-based systems that reduce waste. In short, the market is not one narrow group. That is useful because it spreads your risk.
Set up the right farm space and materials before you buy stock
A good setup saves money later. Start in a cool, dry, shaded place, not in direct sun and not in a damp room. In many parts of Kenya, that means avoiding hot iron-roof spaces during the day unless the room stays well ventilated.

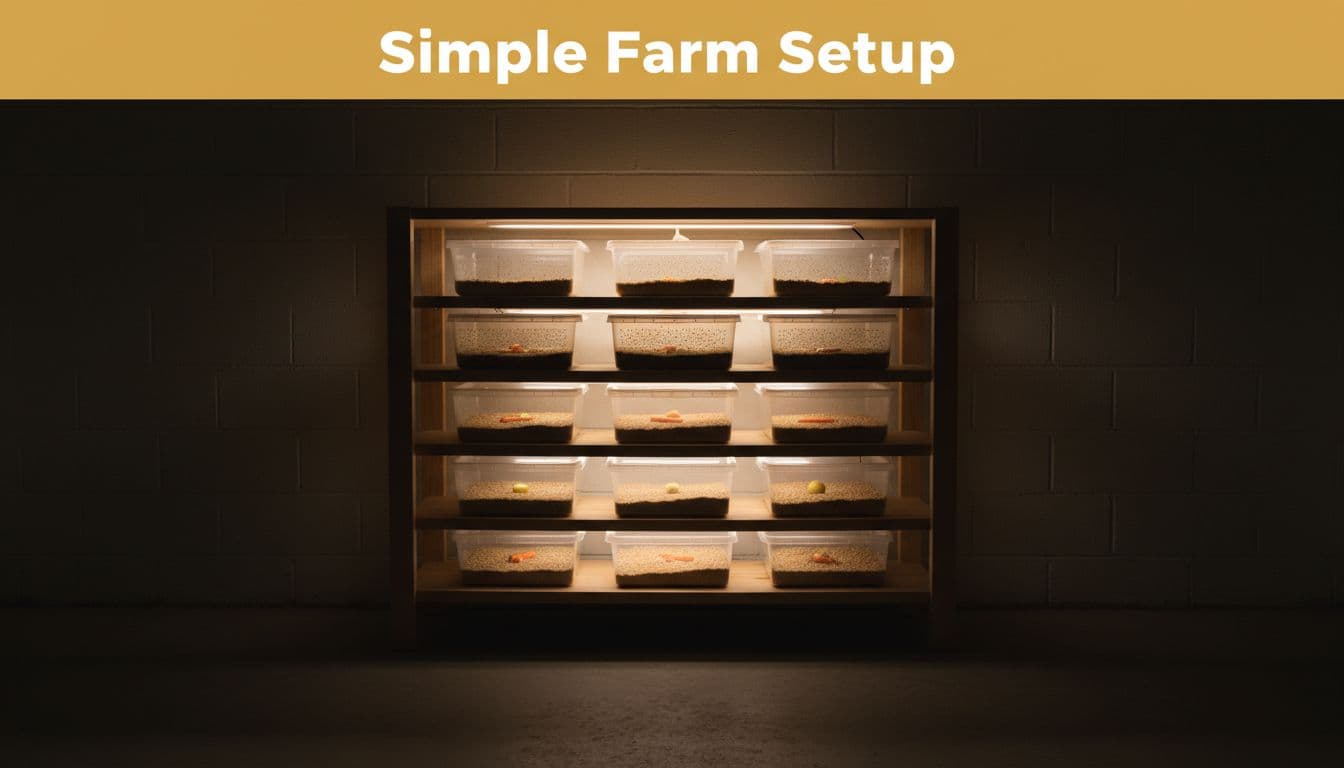
### Choose a simple container setup that keeps worms safe
Shallow plastic containers work well because they are cheap, light, and easy to clean. Add small holes to ensure proper ventilation, then cover them well so ants and lizards stay out. A secure lid matters, but airflow is essential to prevent excess heat buildup.
Place the tubs on shelves or tables, not on the floor. That makes it harder for rats, chickens, and crawling pests to reach them. It also makes daily checks easier.
Use bran as both bedding and feed
Wheat bran serves as the ideal substrate for your colony. This edible bedding acts as both a home and a primary food source for the larvae. While other options like oat or maize bran may work, they must remain clean and dry to avoid spoilage.
Buy only what you can keep dry. If the material absorbs moisture, it clumps, heats up, and becomes a problem. Some farmers lower costs by mixing locally available feed materials, but the bedding still needs to stay loose and fresh to ensure a healthy colony.
Add moisture food without causing mold
Mealworms need moisture, but they should get it from small pieces of food, not wet bedding. Carrot, potato, pumpkin, and cabbage are common choices. As you feed them, monitor the temperature and humidity of the room to ensure the environment remains stable. Use a little at a time and remove leftovers before they spoil.
Kenyan insect farming is already showing the value of turning local organic waste into useful feed systems, as seen in IDRC’s report on insect farming and chicken farmers. The same lesson applies here: use local materials carefully, but do not let wet scraps sit in the tray for too long.
Build your colony the right way so it grows fast
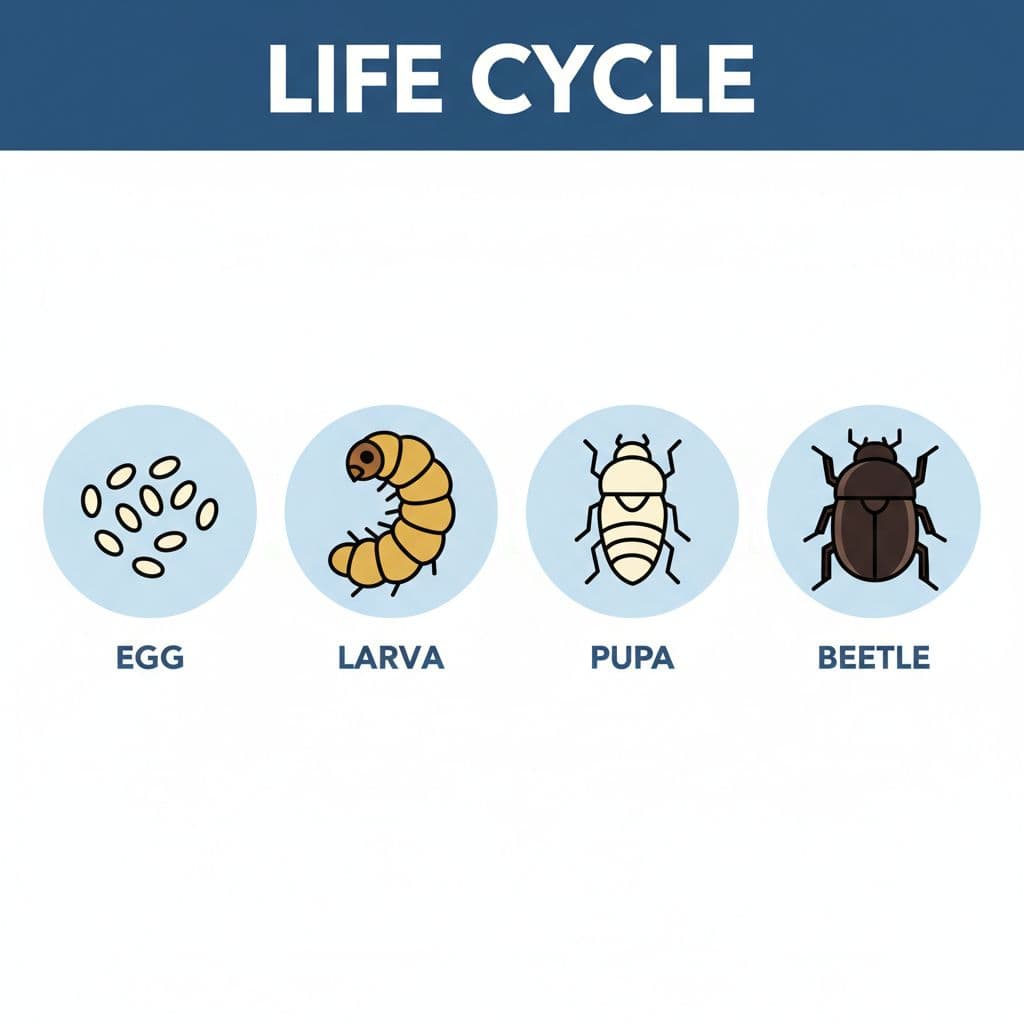
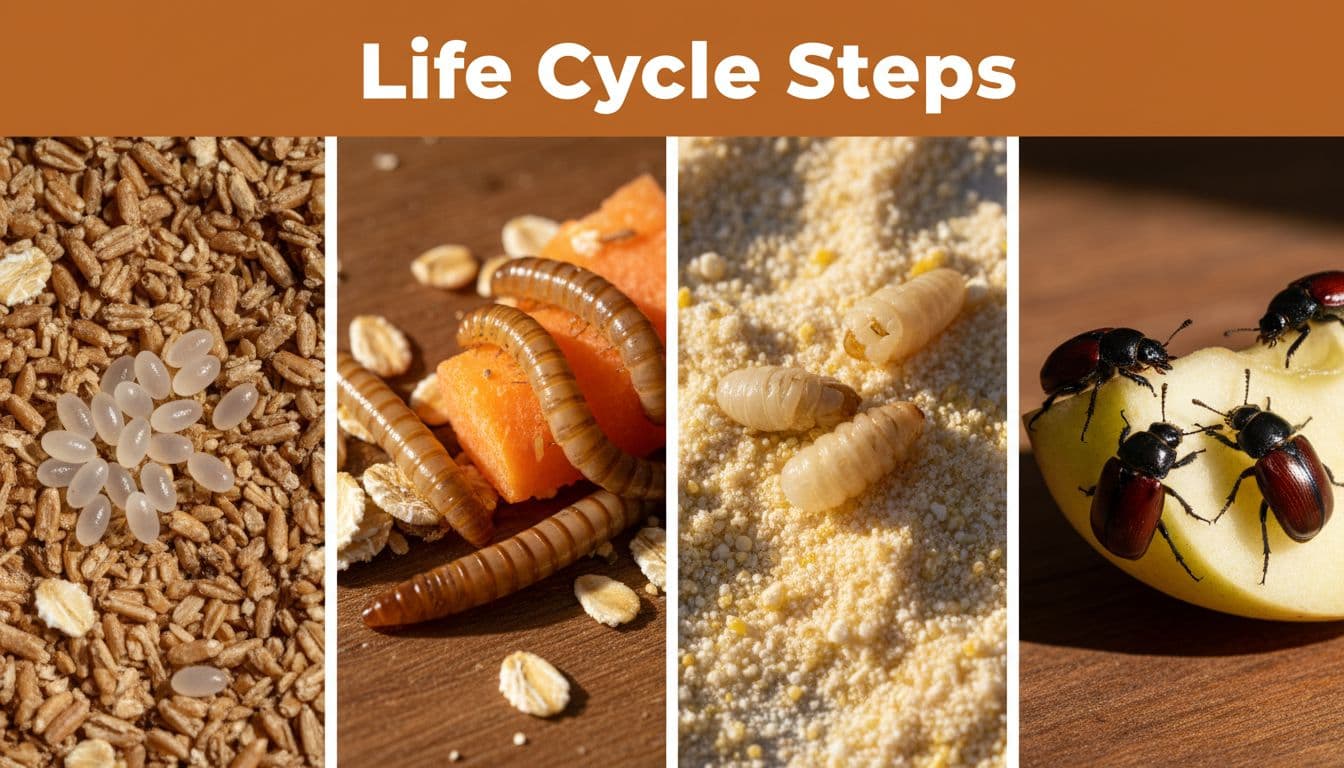
Mealworms pass through four distinct stages: egg, larva, pupa, and the adult Darkling beetle. The larval stage is the primary period for feeding and selling, while the beetle is the essential breeding stage. If you understand how these phases transition from the pupae stage onward, you avoid confusion and prevent lost stock.
You can typically expect your first harvest of larvae about 3 to 4 months after starting your colony. The exact timeline depends on room temperatures, as warmer conditions in Kenya often speed up the life cycle, while cooler environments may slow down development.
Start with enough mealworms to make breeding easier
A starter colony of about 500 mealworms is a practical entry point when you are raising mealworms for the first time. It gives you enough stock to observe the cycle and still keep a meaningful number for breeding. Starting with too few insects often slows growth and tests your patience.
Healthy stock matters more than finding the cheapest source. Choose active, clean-looking worms with no bad smell and no soggy bedding. Good starter stock shortens the road to your first sale.
You can source starter mealworms from established online agricultural marketplaces in Kenya or local insect farming research hubs. Many small-scale farmers also sell surplus starter colonies through social media groups dedicated to poultry and sustainable livestock farming.
Separate pupae and beetles to protect your stock
Pupae do not eat, and they cannot defend themselves well. If you leave them mixed with active larvae, losses rise. Move pupae to their own container until they turn into beetles.
Once beetles emerge, place them in a breeding tub with bran. They will lay eggs there, and those eggs become the next batch of larvae. This simple sorting step protects the future of your colony.
Use a three-tub flow if you want easier management
One tub can work at the start, especially when numbers are low. Still, three tubs make life easier as your farm grows. Use one for breeding mealworms, one for growing larvae, and one for pupae.
That flow cuts confusion. You know where to feed, where to sort, and where to expect the next batch. By creating a self-renewing food source, this system helps you plan sales because you can clearly see which stage is ready for market.
Keep daily care simple so losses stay low
Most mealworm farms do not fail because the business model is flawed. They usually struggle because the bins become wet, hot, dirty, or exposed to pests. Simple routines are the best way to protect your stock and your profit margins.
Keep the bins dry, and many beginner problems disappear.
### Watch for mold, heat, and too much moisture
Direct sun is a common mistake for new farmers. Storing tubs in a room that traps heat all afternoon is equally risky. During hot or humid periods, you must monitor moisture levels closely; check the trays more often and reduce wet feed if leftovers are building up.
Mold spreads fast in closed bins. Once bedding smells sour or feels damp, act at once. Remove spoiled feed, change the bran if needed, and move the trays to a cooler place.
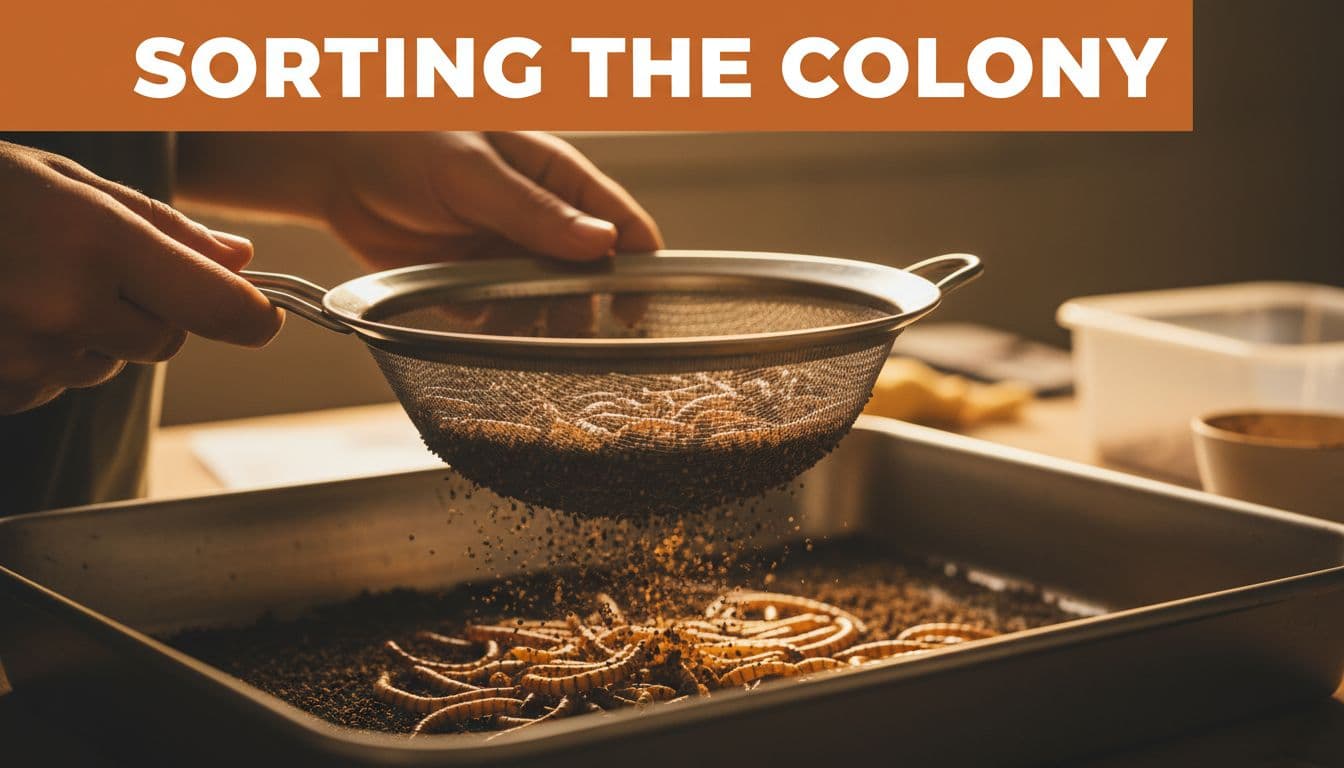
Clean and sort the farm on a regular schedule
Use a sieve or strainer every week or every two weeks, depending on your colony size. This helps remove frass, which is the fine waste that builds up under the worms. As you sift, you will collect worm castings. Do not throw these away, as they serve as a high-quality organic fertilizer that can be sold to local gardeners or used on your own crops. Cleaner bins support better airflow and healthier growth.
Regular sorting also helps you spot pupae, dead worms, and feed problems early. A ten-minute check today can save an entire tray of livestock tomorrow.
Prevent pests and losses before they become expensive
Ants can wipe out eggs and small larvae, while rats and chickens will gladly eat your stock if they gain access to your containers. Lizards are also quick, quiet predators in many farm spaces, so you must seal gaps and keep lids tight.
Raising mealworms requires a secure, protected environment to ensure your initial investment remains safe. Keep your tubs off the ground and maintain a tidy room to deter pests. Even small losses matter when you are still building your colony numbers, so remember that protecting your stock is a vital part of protecting your overall farm profit.
Turn mealworm farming into profit with good selling habits
Raising worms is only half the business. Profit comes from matching the right product to the right buyer, keeping waste low, and supplying people on time. Buyers return when your quality stays the same.
### Sell to customers who need protein-rich feed
Poultry keepers may want live worms for direct feeding or dried mealworms that act as a nutritious snack for pets and poultry. Fish farmers may prefer bulk quantities to mix into their stocks. In bustling urban centers like Nairobi, the demand for high-quality protein is rising as farmers look for sustainable supplemental feed to use alongside traditional commercial feed.
That market is worth taking seriously. Work on sustainable insect meal for fish feed in Kenya shows why insect-based protein keeps attracting attention in aquaculture. If you know what each buyer wants, you can package and price more wisely.
Keep your costs low so margins stay healthy
Your main costs are starter stock, containers, bran, moisture food, and transport. Profit improves when worms survive well, bedding stays clean, and feed waste stays low. Fancy equipment is rarely the answer at the beginning, as the true profitability of breeding mealworms for local markets comes from efficiency and low overhead.
Record what you spend on each tub. Then compare that with how many worms you harvest and sell. Simple records show which trays perform well and which ones keep losing money.
Use a simple path from small start to larger sales
Begin with a few tubs and focus on learning the cycle. After that, build a customer list before you add more stock. Repeat buyers are better than one-time bulk orders because they give you steady movement.
You can also sell more than one format. Some farmers offer live mealworms, dried mealworms, and starter colonies. That creates options without forcing you to change the whole farm.
Frequently Asked Questions
Can I farm mealworms in any part of Kenya?
Yes, mealworms are adaptable, but they require a stable, cool, and dry environment. In hotter regions, you must ensure the farm is in a well-ventilated, shaded area to prevent overheating, which can harm the colony.
How long does it take to see my first harvest?
Typically, you can expect your first harvest of larvae three to four months after starting your colony. This timeline is influenced by ambient temperature, as warmer conditions in Kenya often accelerate the life cycle compared to cooler periods.
What should I do with the worm waste?
Do not discard the worm castings, as they are a highly valued organic fertilizer. You can use this waste on your own crops or sell it to local gardeners, adding an extra income stream to your farm.
Are there any government regulations I need to worry about?
Currently, mealworm farming in Kenya is an informal and unregulated agricultural activity. There are no strict licensing mandates, though you should maintain clean, professional standards if you plan to sell to commercial feed manufacturers.
Conclusion
A profitable mealworm farm in Kenya starts with a small, dry, and well-managed setup. If your colony is healthy and your buyers are steady, the business can grow one tray at a time. Mealworm farming in Kenya is a viable path for those seeking a sustainable alternative to traditional livestock, offering a low-entry barrier for new farmers.
Start with good stock, keep the bins clean, and do not rush expansion. The farmers who do well in this space are usually the ones who stay consistent and protect quality from day one. By maintaining high standards, you can turn this unique agribusiness into a reliable source of long-term income.