
Feed costs can swallow small farm profits fast. For chicken keepers, bird lovers, and small farmers, mealworm farming in Kenya offers a sustainable alternative that requires very little space and only modest cash to start. By producing your own high quality protein source, you can significantly reduce the amount of expensive commercial chicken feed you need to purchase each month.
In Kenya, a few trays in a dry room can produce steady feed for poultry, fish, or pet birds. Small-scale mealworm farming works when the setup stays warm, shaded, and clean, rather than when it gets overly fancy.
The farms that last usually follow one rule: keep the system simple enough to manage every week.
Key Takeaways
- Reduce Feed Costs: Producing your own mealworms provides a sustainable, high-protein alternative to expensive commercial feeds, improving profitability for poultry and fish farmers.
- Keep It Simple: Success relies on maintaining warm, dry, and well-ventilated conditions using basic plastic trays rather than complicated or expensive equipment.
- Moisture Management: The most common cause of colony failure is excess dampness; provide moisture via small vegetable scraps in moderation and remove any spoiled pieces immediately to prevent mold.
- Organize Life Cycles: To build a self-sustaining farm, separate adult darkling beetles from larvae and pupae to protect eggs and improve survival rates.
- Consistent Routine: Regularly harvesting larvae and keeping simple records of feeding and maintenance helps ensure steady production and identifies what works best for your specific environment.
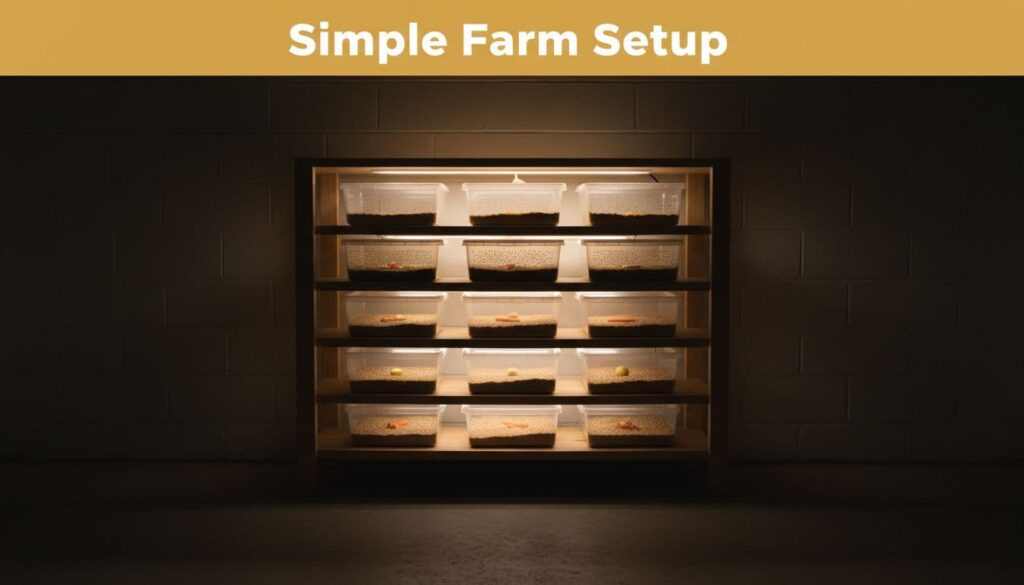
Start with the right setup for Mealworm farming in Kenya
Raising mealworms successfully starts with maintaining the right environment. They thrive in warm, dry conditions, where the temperature and humidity remain stable. A range of about 24 to 27C helps them grow well, while direct sun and damp floors cause trouble fast. In many Kenyan homes, a spare room, store, or simple shed is enough.
You can source starter colonies from fellow poultry farming enthusiasts, local agricultural hubs in cities like Nairobi, or specialized online forums. Many small-scale farmers are willing to sell a small container of live mealworms to help beginners establish their first colony. Always ensure the starter batch looks active and healthy before adding them to your own sanitized trays.
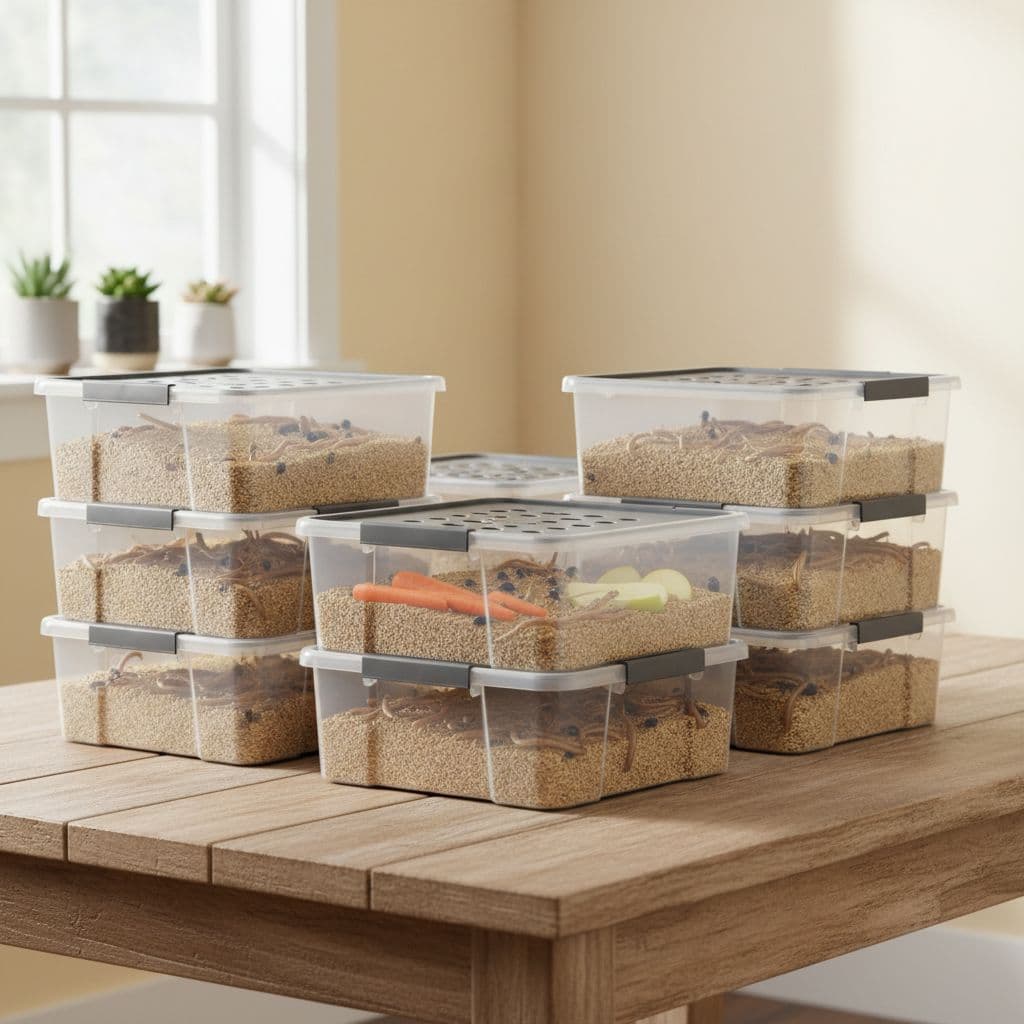
Choose containers that keep worms safe and contained
Use smooth plastic containers or bins with shallow sides. These plastic containers help ensure that the worms cannot climb out, and the shallow design makes sorting much easier. Add small air holes high on the sides or use a ventilated lid. Do not seal the container tight, because trapped heat and stale air lead to stress, smell, and wet bedding.
Use bedding and feed that are easy to find locally
The bedding acts as both a home and the primary substrate for the colony. Wheat bran works well, and in Kenya it is often cheaper from local mills than oats. You can also use oat bran, rolled oats, or a little crushed maize meal mixed in as an edible bedding. Add a shallow layer, then place small pieces of carrot, potato, or cabbage on top for moisture. Keep those pieces small and easy to remove.
Pick a location that protects your crop from heat and dampness
Place the trays in a shaded spot with little disturbance. Keep them away from wet floors, leaking roofs, strong cooking heat, and outdoor rain splash. Raised shelves help because ants, lizards, and rodents reach ground-level bins first. If you want a visual example of a low-cost home system, this DIY mealworm farm guide shows the same basic idea with simple plastic tubs.
How to feed mealworms without causing mold or losses
Most beginners do not lose their Tenebrio molitor colonies because of hunger. Instead, they lose them because the tray becomes too damp. Dry feed should remain in the bin most of the time, while hydration sources should be limited and short-lived.
Give dry feed first, then add small moisture pieces
Top up wheat bran or oats whenever the bedding starts looking thin. Then, add only a few small pieces of carrot, potato, or dry sukuma wiki. Managing moisture levels effectively is the best way to prevent the environment from becoming a breeding ground for mold. The colony should finish these scraps quickly. Because this is organic waste, it must be provided in moderation. If scraps sit for too long, the tray turns damp and mold follows. Carrot is often the safest option because it lasts longer than many softer vegetables, as noted in these mealworm care steps.
Remove spoiled food before it starts growing mold
Check trays often, especially in warm weather. Pull out any soft, blackened, or bad-smelling scraps right away. Also, remove dead insects and wet clumps of bedding. Fresh bedding should smell dry and plain. If it smells sour, the tray needs immediate attention.
If the tray smells before you spot the problem, moisture has already gone too far.
Keep feeding simple so the colony stays productive
A steady routine beats a complicated feed mix. As a form of supplemental feed, providing dry bran followed by limited moisture is the most effective approach. Inspect the tray, remove uneaten organic waste, then repeat. Do not overload the colony because most of the food will not be consumed in time. For chicken keepers and first-time farmers, a low maintenance feeding pattern is easier to keep, and that consistency is what keeps production moving.
Understand the life cycle for breeding mealworms instead of just buying them
A mealworm colony becomes much more cost-effective once it reproduces on its own. That only happens when you can spot each development phase and move the insects before they get eaten or crowded out.
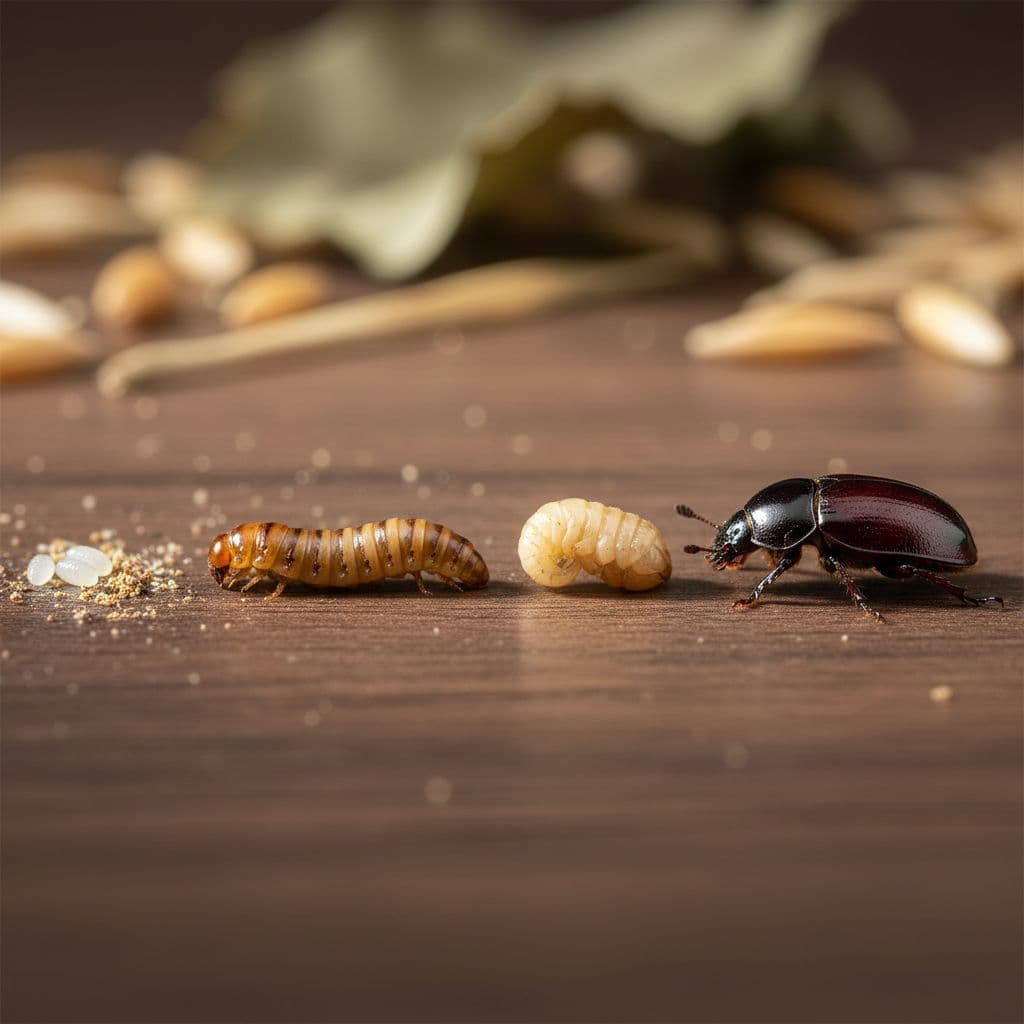
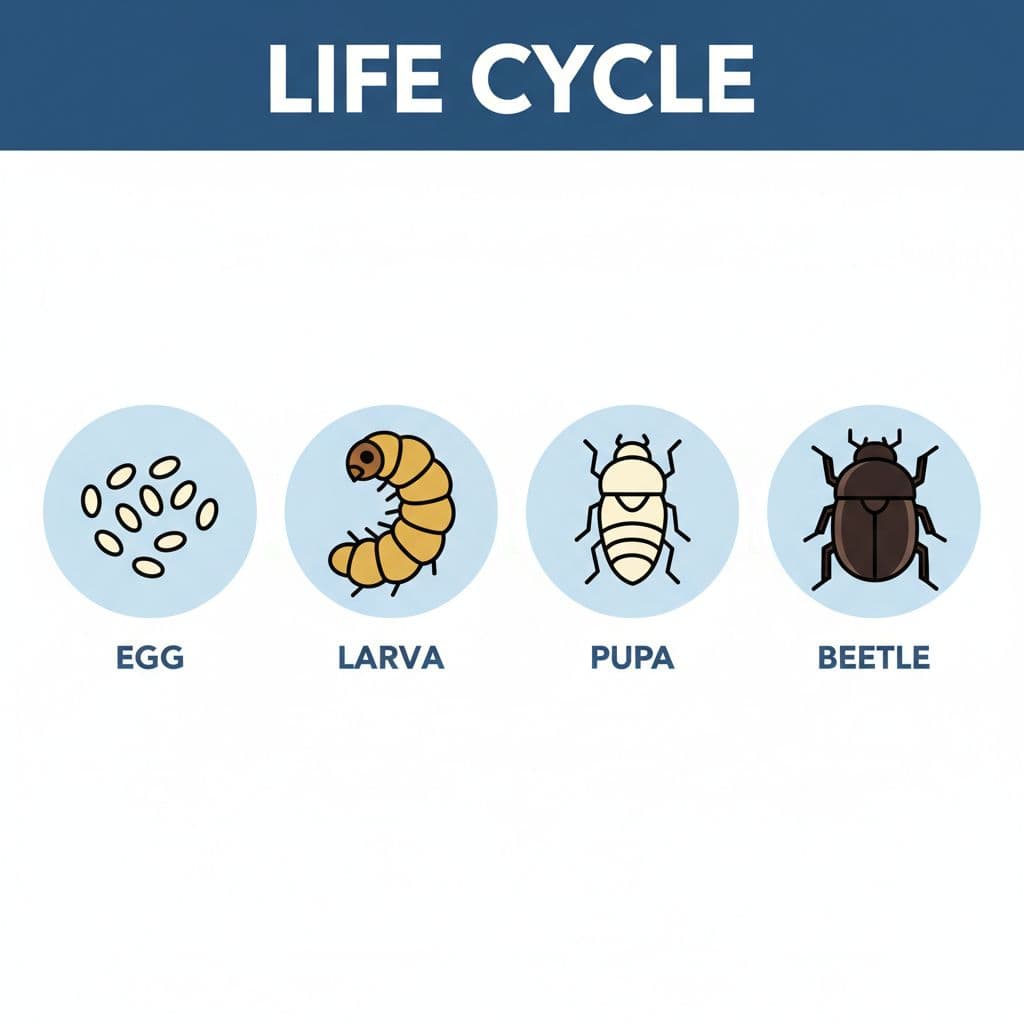
### Photo by AI GeneratedKnow the stages from egg to darkling beetle
The life cycle consists of four distinct phases: egg, larva, pupa, and adult. Eggs are tiny and hard to see. During the larval stage, the insects grow into the mealworms you eventually harvest. The pupae stage features pale, still creatures shaped like curled insects. Finally, the darkling beetle is the active adult that breeds the next generation. When you can identify each stage quickly, you prevent accidental losses before they impact your production.
Separate beetles before they eat eggs and young worms
Adult beetles and larger larvae can damage eggs and pupae if left together. Move fresh pupae into their own tray so they can transition into beetles safely. Keep adult beetles in a breeding tray with clean bran. After they lay eggs for a set period, move the beetles to a new tray and leave the eggs behind. This simple habit improves survival rates and ensures you maintain a self-renewing food source for your farm.
Use a simple tray system to sort worms by stage
A three-tray setup is enough for most small farms. Use one tray for breeding beetles, one for growing larvae, and one for worms ready to harvest. Label each tray with the date you started it. For small-scale mealworm farming in Kenya, that basic sorting system is what turns a few bins into a thriving, self-sustaining colony instead of a one-time batch.
Harvest mealworms the easy way and use them well
Harvesting does not need special gear. The goal is to collect large larvae, leave the smaller ones to grow, and return useful bedding to the right tray. Since you are likely producing this high-protein chicken feed yourself, harvesting at the right time ensures your flock gets the best nutrition possible.
Pick the right time to harvest for the best feed value
Harvest larvae when they are plump, active, and close to full size, but before many start turning into pupae. If too many pupate, you lose feed and crowd the breeding cycle. Regular harvesting also opens space in the tray, which helps the remaining worms grow better and keeps the colony from stalling. Consistent harvesting is a staple of efficient poultry farming, ensuring you always have enough stock to keep your birds healthy.
Separate worms from bedding without damaging them
A simple kitchen sieve or wire mesh works well for small holders. Shake the contents gently so the bran and worm castings fall through while larger larvae stay on top. These castings are a highly prized organic fertilizer that can be used in your garden or sold to other local farmers. Once sifted, sort out the pupae and return small worms to the grow-out tray. If your bins start compacting, this guide to sifting frass and sorting trays gives practical tips that match small-scale production.
Feed chickens, birds, or fish in the right amounts
Mealworms are best used as a supplement, not the whole diet. Chickens love them, as the high protein content often leads to yellow-yolked eggs and a superior, rich Kienyeji taste in poultry meat. Fish take them well, and people who feed garden or pet birds value the extra nutrition. Start with small amounts and watch how fast they disappear. Match the worm size to the animal, and do not let uneaten worms sit in wet feeders or muddy runs.
Avoid the mistakes that stop small farms from growing
Most failed colonies show the same warning signs early. The tray gets damp, the life stages stay mixed too long, and owners fail to track operational changes. By fixing these three common pitfalls, you can turn your small-scale operation into a sustainable agribusiness.
Watch out for too much water and poor airflow
Wet bedding is the fastest way to lose stock. Sealed bins trap moisture, and poor airflow turns feed sour. Proper ventilation is essential to ensure the environment remains dry, preventing clumped bran, a stale smell, or dead larvae. When you see these warning signs, remove wet scraps immediately, replace the bedding if needed, and improve the airflow before the entire tray declines. Maintaining a healthy colony allows you to replace expensive commercial feed with your own home-grown protein source, significantly lowering your overall production costs.
Do not leave beetles, eggs, and young worms together too long
Mixed life stages create hidden losses. Beetles often disturb eggs, while larger larvae may bother pupae, which lowers overall survival rates. For those with limited space, mealworm farming serves as an excellent alternative to black soldier fly farming, provided you maintain organized separation. Sort your active bins every few weeks and move pupae out early. The colony does not need a complex system, but it does require consistent separation. That is why organized tray rotation almost always beats a larger, messy setup.
Keep records so you know what is working
A simple notebook is enough to track your progress. Write down when you fed each tray, when you moved beetles, when you sifted waste, and how much you harvested. Over time, clear patterns will emerge. You may find one bedding mix stays drier or one room maintains a better temperature than others. Those notes save money because you stop guessing and start repeating the methods that actually work for your specific setup.
Frequently Asked Questions
Can I start a mealworm farm if I have very limited space?
Yes, mealworm farming is ideal for small spaces because the colony can be housed in stacked plastic bins. As long as you have a stable, warm, and dry area—like a spare room or a clean shed—you can produce a significant amount of feed without needing a large farm footprint.
What should I do if my mealworm tray starts to smell sour?
A sour smell usually indicates that the bedding has become too damp and mold is starting to grow. You should immediately remove any wet or rotting food scraps, discard clumped or discolored bedding, and move the colony to a drier, better-ventilated location to prevent total loss.
How often should I harvest my mealworms?
Harvesting should be done consistently once your larvae reach a plump, full size but before they turn into pupae. Regular harvesting prevents overcrowding and keeps the colony productive, ensuring a steady stream of feed for your chickens or other livestock.
Do I need to buy expensive feed for the mealworms?
No, you can use affordable local substrates like wheat bran, oat bran, or crushed maize meal as the primary bedding and food source. Supplement this with small, occasional scraps of carrot or potato for hydration, which are cost-effective and easy to source in Kenya.
Is it necessary to separate the different life stages?
Yes, keeping beetles, pupae, and larvae separated is the most important step for growing a healthy, sustainable colony. Adult beetles can accidentally damage eggs or pupae if left together, so moving pupae to their own tray ensures more insects reach maturity.
A few dry trays can become a reliable feed source
Mealworm farming on a small scale works best when the setup stays dry, warm, and easy to manage. You do not need costly equipment, and you do not need a large building. By maintaining these conditions, your harvest serves as a high-protein, nutritious snack for your birds or fish, helping you improve their health and vitality with home-grown resources.
Start with a few trays, sort the life stages, and keep moisture under control. With that routine, a small colony can grow into a steady source of feed, and in time, a small extra income too.
In Kenya, small-scale mealworm farming for personal use or feed production is generally considered an informal agricultural activity and does not currently require specific permits. However, if you plan to scale up into commercial distribution or supply larger livestock operations, it is wise to check with your local County Agricultural Office regarding any specific food safety or feed quality regulations. Keeping your setup clean and simple is the best way to ensure compliance with general hygiene standards for animal feed as you expand your mealworm farming in Kenya.